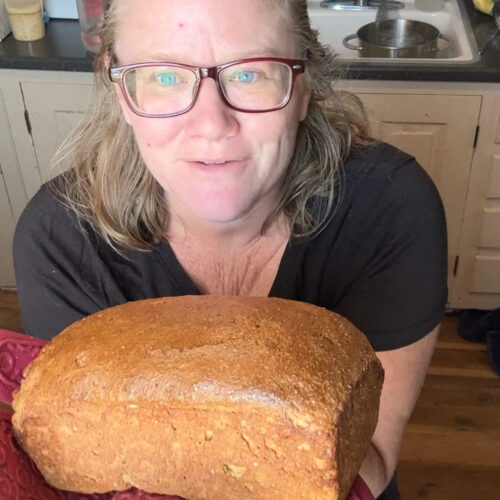
Sandwich Bread | Superbly Soft Enriched Loaf
Fat makes for a more tender bread, and so we like to add it to things like rolls or buns,whatever you want to call them. “Enriched” dough usually includes fat, higher amounts ofsugar or honey, eggs, and milk (which includes fat). These things tenderize the bread, andI think you’ll enjoy the texture a bit more than the basic loaf (especially if you like a sweeter flavor).
Ingredients
- 510 g hard wheat berries 3 cups of whole grain
- 320 g whole milk 1 1/2 cup
- 12 g yeast 4 tsp
- 10 g sea salt 2 tsp
- 50 g honey 1/8 cup plus 1 tsp
- 50 g butter or extra virgin olive oil softened (1/4 cup)
- 50 g egg 1 whole
- ⅛ tsp vitamin C
- 40 g boiling water
Instructions
Active Dry Yeast:
- If using active dry yeast, place 100 g of the water into a cup, along with the yeast and 10 grams of the sweetener from your recipe.
- Let sit until "Add in Yeast and Salt" step.
Mixing
- Place a small cup on your scale, press the ZERO or TARE button. This is called "zeroing out the scale".
- Add 20 grams of flour to the cup, and zero out the scale as you did in the previous step.
- Pour 40 grams of boiling water into the cup, and quickly mix the two together to form a paste.
- Place your mixing bowl on your scale and zero out the scale.
- Add everything EXCEPT the yeast and sea salt to your mixing bowl, and knead for 5-7 minutes with a dough hook on the recommended speed for your mixer for the dough hook (usually speed 2 or 3), or whisk it until the mixture comes together (about 1 minute) with your whisk attachment (on highest speed).
- Let the dough rest for 15-20 minutes.
Add in Yeast and Salt
- Sprinkle the yeast (or the mixture from the active dry yeast steps, if using) and salt into the mixing bowl over the dough.
- Mix for several minutes, until your dough passes the windowpane test. This is done by turning off your mixer, and gently/slowly stretching the dough to see if light can be seen through it before breaking. If so, you've passed the test and can move on. If your dough looks tough or dry, you can slowly drizzle water in during the mixing until it is a consistency you like.
First Rise (AKA Fermentation)
- Let the dough rise, covered, until doubled. When you press a wet finger into the dough, it should remain pressed in, and not spring back quickly. If the dough ball loses air when you do this, you waited too long. Move on, it'll still be and alright loaf.
Punching Down the Dough
- Gently pull up on one side of the dough, and gently press it into the center of the dough ball. Turn the bowl by one quarter, and repeat until you've done this 4 times. This helps ensure a consistent dough temperature, and a more consistent crumb.
Shaping
- Spread your dough out into a rectangle shape. Fold the side into the middle, and gently roll the dough up. Throw it down on the counter a few times, then gently tuck in the bottom and sides, and place it SEAM SIDE DOWN into your greased or lined 9" x 5" bread pan.
- Preheat your oven to 420 F.
Second Rise (AKA Proofing)
- Let the dough rise until the dough does not spring back quickly when you poke into it with your finger (to the first knuckle). It should take about half the time it took for the first rise.
Baking
- Place your bread pan gently into the middle of the oven, and close the oven door.
- Adjust the oven temperature to 375 F, and set a timer for 35 minutes.
- Check the temperature of the absolute middle of the loaf by sticking it from the side with an instant read thermometer.
- Remove the bread from the oven when the dough has reached 200 F (although going up to 205 F would be alright with this enriched loaf). It can typically take anywhere from 40-55 minutes depending upon multiple factors.
Cooling and Storing
- Gently remove the bread from the pan, and let it cool fully on a rack with air flow all around the loaf. This generally takes 3 hours. If you slice into it early, it may get dense as the crumb is still solidifying while it cools.
- Slice your bread with a very sharp serrated bread knife.
- Store on the counter in a plastic bag or beeswax wrap for a few days, in the fridge if your climate is very hot and humid, or slice and freeze the loaf for bread on the fly. It defrosts quickly without any extra steps.
Video
Notes
This dough is also excellent for making dinner rolls, hamburger buns, sub/hoagie rolls, or cinnamon rolls.
Nutrition
Serving: 50gCalories: 163kcalCarbohydrates: 27gProtein: 6gFat: 4gSaturated Fat: 1gPolyunsaturated Fat: 0.4gMonounsaturated Fat: 3gTrans Fat: 0.001gCholesterol: 14mgSodium: 255mgPotassium: 45mgFiber: 4gSugar: 4gVitamin A: 49IUVitamin B1: 0.1mgVitamin B2: 0.1mgVitamin B3: 0.3mgVitamin B5: 0.2mgVitamin B6: 0.03mgVitamin B12: 0.1µgVitamin C: 1mgVitamin D: 0.3µgVitamin E: 0.5mgVitamin K: 2µgCalcium: 41mgIron: 1mg
Tried this recipe?Let us know how it was!