Punching Down the Dough & Scaling
Punching down the dough and scaling both happen after fermentation—and there’s a reason for that.
At this stage, we want to:
relax the gluten
release excess gas
even out dough temperature
prepare the dough for shaping
If large bubbles are left trapped inside the dough, they’ll turn into giant holes during baking. Most of the time, that’s not what we want.
(If you do want big holes—like for certain rustic loaves—you can skip or minimize this step.)
Scaling is simply a fancy word for dividing your dough into the right sizes for what you’re baking.
Punching Down the Dough: What We’re Actually Doing
“Punching down” doesn’t mean beating up your dough. It’s about gently degassing and resetting it so the next rise is more even and controlled.
Recommended Technique (Gentle + Effective)
This is the method I recommend:
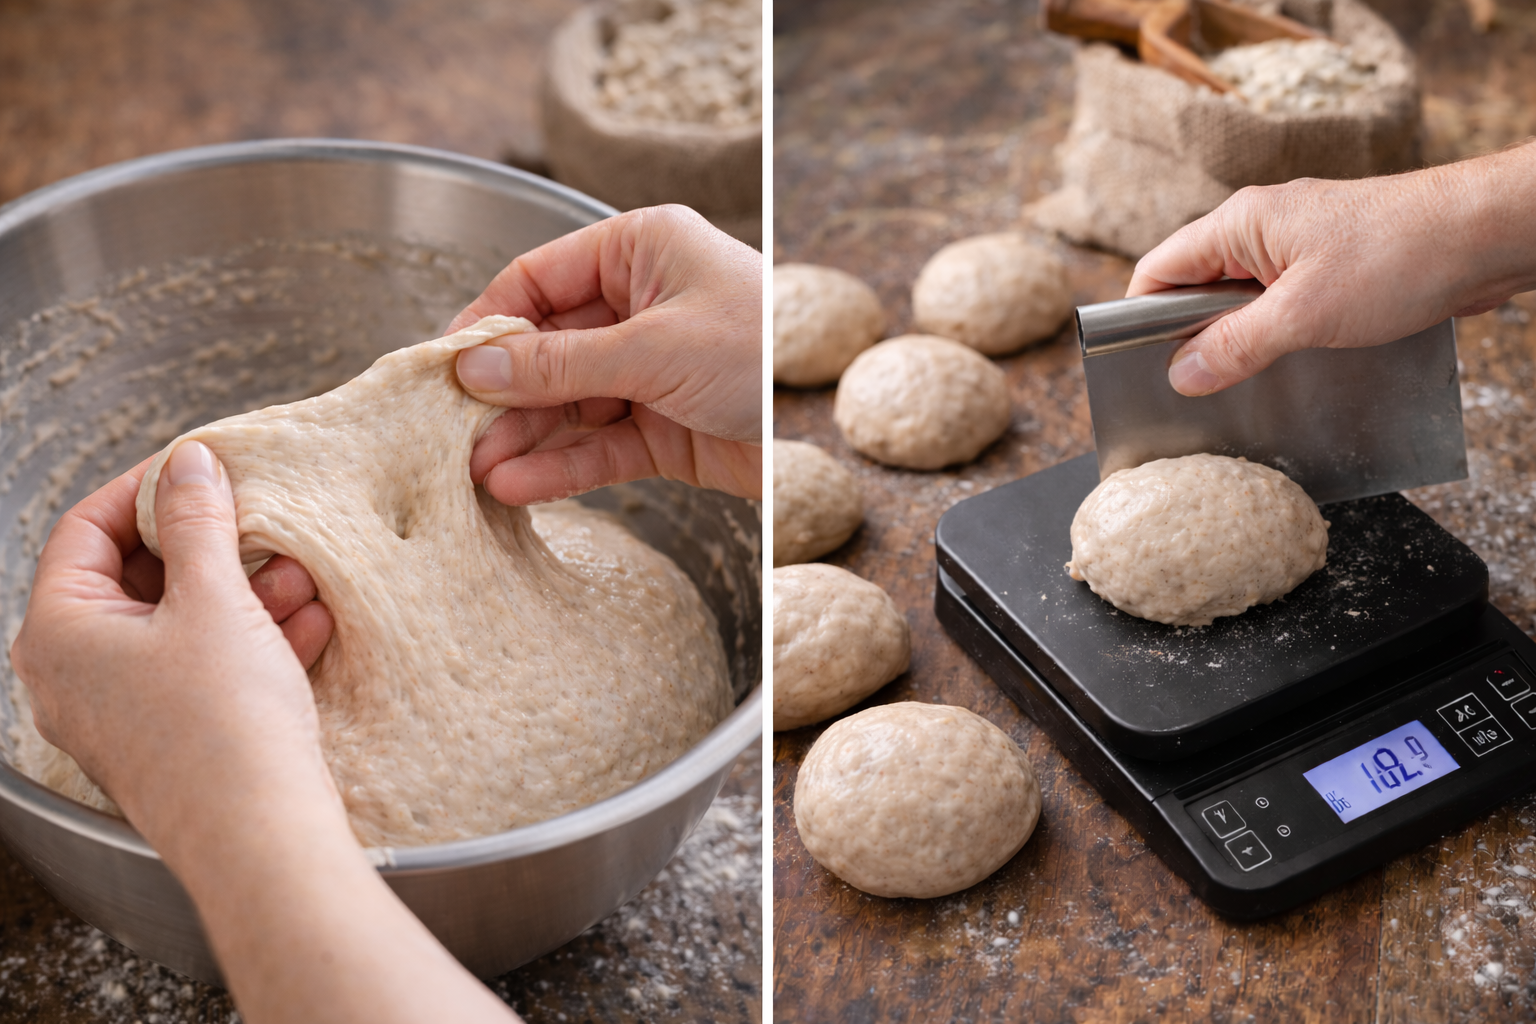
Stretch the dough up from one side
Fold it over the center
Press down gently
Rotate the bowl one-quarter turn
Repeat until all four sides are folded
Flip the dough upside down in the bowl
This method:
releases excess gas
relaxes gluten evenly
keeps structure intact
Common Techniques (Also Totally Fine)
Some bakers prefer to:
dump the dough onto the counter and gently press it flat
give it a literal punch with a fist
briefly pulse the mixer to knock out air
All of these work.
Your kitchen, your rules.
The key is releasing excess gas without tearing the dough apart.
Scaling the Dough (Dividing It Up)
After punching down comes scaling, also known as dividing the dough.
This is the beginning of shaping—where you decide:
how many loaves or rolls you’re making
what size pans to use
Pan size matters:
Too small → dough mushrooms over the top
Too large → short, squat loaf
Scaling lets you match dough size to pan size instead of guessing.
💡 Not sure how much dough your pan needs?
Instead of guessing, I use a simple water-based method that works with any loaf pan—even non-standard sizes.
How I Figure Out the Right Dough Amount for Any Loaf Pan (for 100% Fresh Milled Whole Grain Bread
No complicated math. Just a repeatable method that takes the guesswork out of scaling.
Scaling Without a Scale (AKA Eyeballing)
If you don’t have a scale, you can still do this well.
For loaves:
Shape the dough loosely
Place it in a pan
If it fills less than half, use a smaller pan
If it fills more than half, use a larger pan
You can also divide the dough and make:
one large loaf + one mini loaf
multiple small loaves
For rolls:
Divide the dough in halves, thirds, or quarters
Then divide again until you reach the number you want
Example:
To make 9 rolls, divide the dough into thirds, then divide each third into three.
Scaling With a Scale (Most Precise)
Using a scale removes the guesswork.
Weigh the full dough
Choose a pan based on dough weight
Either:
match the pan to the dough
or cut the dough to match the pan
Extra dough?
Make flatbread, rolls, or mini loaves. Bonus bread is never a problem.
For rolls, pretzels, or bagels:
If size doesn’t matter → divide evenly by count
If size does matter → divide total dough weight by desired gram size
Average Bread Pan & Roll Sizes (Guide)
Use these as starting points:
Pullman 13 × 4 × 4 (1.5 lb loaf): 1100–1200 g
Pullman 9 × 4 × 4 or standard 9 × 5 pan: 800–950 g
Pullman 8 × 4 × 4 (1 lb): 685–750 g
Standard 8 × 4 × 2.5 (¾ lb): 430–675 g
Mini loaf pans: 200–275 g
Rolls:
Hot dog rolls: 80 g
Hamburger rolls: 90 g (small), 100 g (medium), 120 g (large)
Hoagie / sub rolls: 150 g (small), 250 g (large)
Timing Matters Here
Work efficiently while scaling, especially with enriched dough.
Fermentation doesn’t stop until the yeast dies in the oven. The longer the dough sits, the more it continues to rise—whether you’re ready or not.
What If My Dough Is Too Wet?
First: don’t panic. Many bread doughs are supposed to be wet.
If it’s just a little sticky:
oil your hands
oil the board
lightly oil the scale
use wet hands
If it’s very wet:
add just enough flour to make it manageable
continue using oil rather than dumping in flour
Too much added flour at this stage leads to:
dense bread
dry crumb
When in doubt, less flour is usually better.
Next up:
💡 Shaping Fresh Milled Bread Dough
Join our Online Community
Ready to ditch recipes and learn more about baking with fresh milled flour using methods and your imagination? Join my Fresh milled Flour Methods group. You can ask questions, share your wins, and more with an expectation of honesty and friendly interaction. I hear it’s the best place to be on Facebook.