
My favorite bread base, the Italian Bread Base, has been the only thing I've used since perfecting it. It took me about half a year to get it just right, and then it took me a little longer to realize I could do it without additives such as vital wheat gluten. I had figured that out in my basic loaves, which I no longer make, but sometimes progress requires you to re-learn what you already did.
Once I really got the hang of things with this base, I wanted to challenge myself more by creating a sourdough version. Besides, many of you were asking if it could be done. The old way I would have converted it would have been dropping the flour by 100 grams, dropping the water by 100 grams, and using 200 grams of liquid starter (a starter fed it's weight in flour and water).
The problem is that my liquid starter wasn't very practical. It was fussy, and I'd kill it on a somewhat regular basis. After reading The Sourdough Framework, I learned a lot and switched to a stiff starter. You can read all about that HERE. I'll be using a stiff starter in all my sourdough recipes, but if you want to use a liquid one you can - by following the advice above or using my sourdough converter.
The Base
How Long For the Bulk Fermentation (AKA the 1st Rise)?
This will always change depending on many factors including your starter, the environment and the exact recipe you use. It typically takes my loaves between 6 and 12 hours for the loaves to finish the bulk fermentation, but I've found my impatience to be rewarded after 9 hours even if I didn't see all the changes I was looking for.
What am I looking for to know it's done?
You should notice several things to tell you your loaf is ready to move on to shaping:
- it has increased in size -anywhere from 50% to doubled in size
- the dough will be jiggly when you shake the container it's rising in
- the dough will pull away from the sides easily
- it should have little bubbles on the surface
If it rose and is sticky, that's a sign that you let it rise too long. Carry on - it will still make decent bread, but I'd bake it in a plan or use it as flatbread rather than an open bake.
Shaping the Loaves
There are SO MANY different ways to shape a loaf. I tend to shape my bread pan loaves the same way I shape the yeast version. Gently shape the bread into a rectangle on a lightly floured board. I use rice flour, which is made when cleaning the stones by running brown rice through your mill. Keeps the stones clean and I always have flour on hand for this purpose.
Once I have the rectangle shape, I gently stretch out the top corners and fold them over the midline of the rectangle and gently press down to seal. Then I do the same for the bottom corners before rolling the dough up, and getting a taut skin on the loaf. Then into a greased or parchment lined pan it goes.
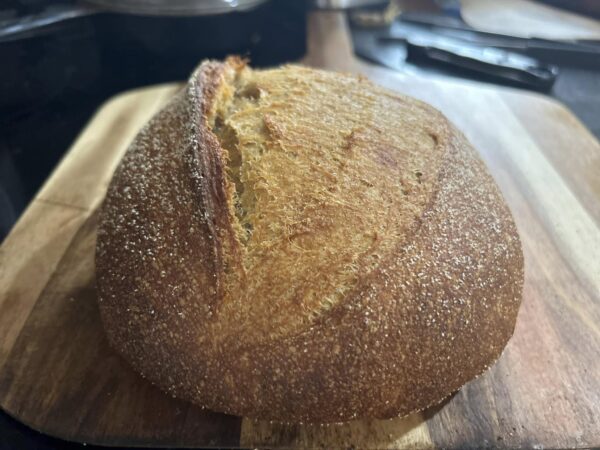
For an open bake, I tend to stretch the dough out and then bring various parts of the dough into the center. I roll it over, and shape it into a taut round ball. Simple, yet effective.
Scoring the Loaves
For round loaves, I like to score in a round style, such as a circle all the way around the loaf - rather than a score across the loaf. It expands in a way I prefer - try it both ways and see what you like. You can make your scoring as pretty as you like. Just know - scoring is OPTIONAL.
For pan loaves, I tend to score down the center of the loaf with my super sharp knife or razor (AKA bread lame) at a 45 degree angle to the bread. You can dust the loaf with flour before you score for a pretty contrast when you bake. Remember scoring is optional.
What's the purpose? To control where the loaf expands. Sometimes the crust forms before the loaf is finished rising, so you may see tearing along the sides of the loaf. Scoring can help prevent that tearing in an unwanted spot, and instead the bread will expand where you cut it.
Again, totally OPTIONAL.
The Second Rise
The second rise can be done on the counter while the oven is preheating, or it could be done in the fridge if you aren't ready to bake the loaf just yet. When you're ready, you can remove it from the fridge and place it directly into the oven OR you can remove it from the fridge and let it come to room temperature as the oven is pre-heating. If you have a pan that cannot handle drastic temperature changes (like stoneware, glass, or cast iron) - letting it come to room temperature could work OR you can put the cold pan directly into a COLD oven, and let it go through the preheat and bake all at the same time. Just expect the time frame to be longer. I'd start at 1 hour with the cold bake start, and then take the temperature of the loaf to determine if you need to bake longer and by how much.
How to Open Bake
First, you need to make sure you do a good job shaping your dough. To start, I'd use the lower amount of water until you get used to working with a dough that's higher hydration. Then slowly work up to the amount you're comfortable with and love the results for best.
Bake with Steam
I prefer to bake at 450 F for 15 minutes with steam. I have a large baking stone that stays in my oven all the days of it's life. I bake directly on that stone, and I add a towel soaked in hot water and my bread on top of that stone. I add several scotch rocks ice cubes directly to the bottom of the oven as well.
You can leave the temperature at 450 F, or lower it to 400 F after the steam bake time is up (15 minutes). When 15 minutes is up, remove the towel from the oven! Very important. The only real differences between baking at 450 F and lowering to 400 F are:
- the time it takes to finish baking the loaf
- the darkness of the crust
When to remove the loaf from the oven? When the internal temperature at the absolute middle of the loaf is 197 F or above. Try not to let it go above 205 F. We don't want to cook all the water out of it!
Let the loaf cool fully on a baking rack, with air all around it.
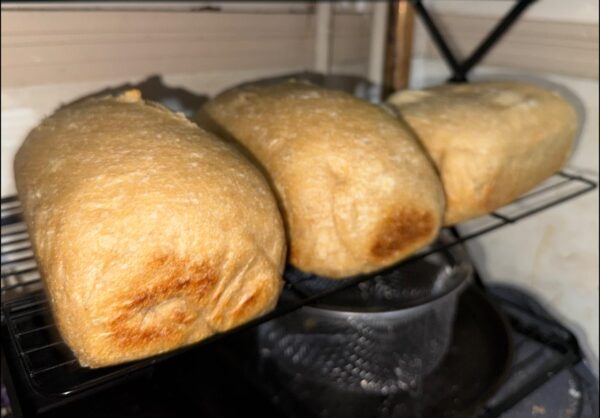
How to Bake in a Loaf Pan
I love baking my loaves using 2 Lodge Cast Iron bread pans. They are WONDERFUL dutch ovens, trapping the water inside - which creates STEAM! I prefer to use parchment paper to line the pans, but you can also grease the pans well with butter or a high quality extra virgin olive oil like Kasandrinos.
I typically make the 8.5 x 4.5" loaf so I can use those pans, and I bake at 450 F, with the one pan placed on top of the other upside down (to create a dutch oven). I bake for 30 minutes covered, and then check the temperature with my instant read thermometer.
If the bread isn't 197 F or above, I bake at 450 F until the loaf gets there. Usually it's only a few minutes, but often I don't need to do this step at all. The bread often reaches temperature in the first 30 minutes covered.
The length of time it takes to bake will depend upon loaf size and temperature of the pan and the loaf. If you do a fridge rise before baking, the dough will take longer to get up to temperature than if the loaf was proofed at room temperature.
Can you see why learning the methods is important? We cannot just say BAKE for X MINUTES. It may be different every time!
When you remove the loaf from the oven, also remove it from the bread pan, and peel the parchment from the loaf before letting it cool on a baking rack. DO let it cool before slicing.
What if I Can't Wait to Slice My Bread?
I totally get it if you can't wait - sometimes I can't either. TRY to wait at least 10 minutes for the crumb to solidify a bit before slicing, and I advise you to slice from the edge of the loaf rather than the center. Then, when you're done snagging a slice - place it cut side down on the counter. This will limit the amount of liquid that escapes your loaf while it cools.
That is a BIG part of why we let it COOL before we slice - to keep the moisture INSIDE the loaf where it belongs.
Join our Online Community
Ready to ditch recipes and learn more about baking with fresh milled flour using methods and your imagination? Join my Fresh milled Flour Methods group. You can ask questions, share your wins, and more with an expectation of honesty and friendly interaction. I hear it’s the best place to be on Facebook.